
Web bluetooth has been around since a few years now, and enables people to exchange data with sensors and connected devices.
However, not every browser supports Web Bluetooth juste yet. You can find here a list of supported web browsers. On iOS you can install the app Bluefy to enable the use of Web Bluetooth.
We will detail here how to connect to a heart rate sensor and display the provided information on your web page, using only javascript, without any installation required by end users.
First, you will create your usual suspects: index.html, style.css and script.js files.
In your index.html, you will only need a minimal code, with a button and an empty paragraph.
<!DOCTYPE html>
<html>

    <head>
        <meta charset = "utf-8">
        <title>My first Web Ble app</title>
        <meta name = "author" content = "Ullo Labs">
        <meta name = "description" content = "Simple app using web bluetooth to connect to a remote heart sensor">
        <meta name = "viewport" content = "width=device-width, initial-scale=1">
        <link href="./style.css" rel="stylesheet">
    </head>

    <body>
        <button id = "connectButton">Connect</button>
        <p id = "dataText"></p>
        <script src = "./script.js"></script>
    </body>

</html>
This simple CSS content should be more than enough for now:
#connectButton {
    cursor: not-allowed ;
}
Now, let’s see our javascript content.
First, you will have to check if your browser supports the web bluetooth.
This can simply be done with the following line:
let p = document.getElementById("dataText") ;
if (navigator.bluetooth === undefined) {
    p.textContent = "Web bluetooth is not supported" ;
}
else {
    let button = document.getElementById("connectButton") ;
    button.style.cursor = "pointer" ;
    // the rest of your code
}
Now, let’s add a callback function to our button:
let p = document.getElementById("dataText") ;
if (navigator.bluetooth === undefined) {
    p.textContent = "Web bluetooth is not supported" ;
}
else {
    let button = document.getElementById("connectButton") ;
    button.style.cursor = "pointer" ;

    onClickEvent = (event) => {
        console.log("clicked") ;
    }

    button.addEventListener('click', onClickEvent ) ;
}
Here, we will simply display the word clicked on our console.
But we want now to connect to our device and listen for incoming data.
This will be done with the following lines:
handleCharacteristicValueChanged = (event) => {
    // we will add code here later to process the incoming data
}

onClickEvent = () => {
    navigator.bluetooth.requestDevice({ filters: [{ services: ['heart_rate'] }] }) // we filter the devices, displaying only those with heartrate services
    .then(device => device.gatt.connect()) // after the user select a device, we return the selected one
    .then(server => server.getPrimaryService('heart_rate')) // we get the service
    .then(service => service.getCharacteristic('heart_rate_measurement')) // then the characteristics
    .then(characteristic => characteristic.startNotifications())
    .then(characteristic => {
        characteristic.addEventListener('characteristicvaluechanged', handleCharacteristicValueChanged) ; // then we subscribe to the characteristic notifications
    })                                                                                                      // and set the callback function
    .catch(error => { console.error(error); }) ; // we display the errors on the console
}
button.addEventListener('click', onClickEvent ) ;
Now, we only need to process the incoming data:
handleCharacteristicValueChanged = (event) => {
    let value = event.target.value ; // a dataviewer object is provided by the object event
    let heartrate = value.getUint8(1) ; // we select the eight bytes that contain the heartrate informations
    p.textContent = heartrate + " BPM" ; // and display it
}
So, at the end, your javascript file will look like that :
let p = document.getElementById("dataText") ;
if (navigator.bluetooth === undefined) {
    p.textContent = "Web bluetooth is not supported" ;
}
else {
    let button = document.getElementById("connectButton") ;
    button.style.cursor = "pointer" ;

    handleCharacteristicValueChanged = (event) => {
        let value = event.target.value ; // a dataviewer object is provided by the object event
        let heartrate = value.getUint8(1) ; // we select the eight bytes that contain the heartrate informations
        p.textContent = heartrate + " BPM" ; // and display it
    }

    onClickEvent = () => {
        navigator.bluetooth.requestDevice({ filters: [{ services: ['heart_rate'] }] }) // we filter the devices, displaying only those with heartrate services
        .then(device => device.gatt.connect()) // after the user select a device, we return the selected one
        .then(server => server.getPrimaryService('heart_rate')) // we get the service
        .then(service => service.getCharacteristic('heart_rate_measurement')) // then the characteristics
        .then(characteristic => characteristic.startNotifications())
        .then(characteristic => {
            characteristic.addEventListener('characteristicvaluechanged', handleCharacteristicValueChanged) ; // then we subscribe to the characteristic notifications
        })                                                                                                    // and set the callback function
        .catch(error => { console.error(error); }) ; // we display the errors on the console
    }
    button.addEventListener('click', onClickEvent ) ;
}
and once connected you should see your BPM on your web page:
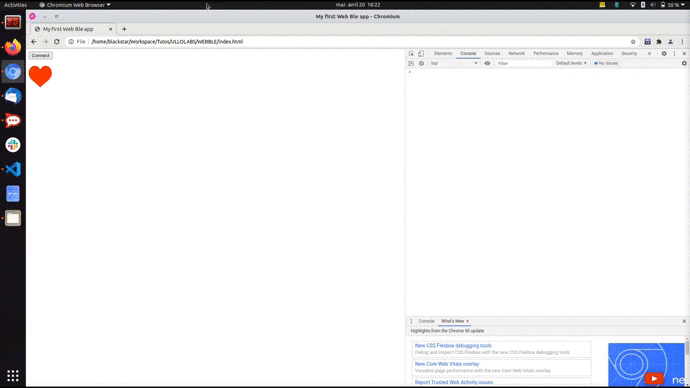
Bonus: we would love to see a little heart on our screen!
Juste add a sprite in your HTML:
<!DOCTYPE html>
<html>

    <head>
        <meta charset = "utf-8">
        <title>My first Web Ble app</title>
        <meta name = "author" content = "Ullo Labs">
        <meta name = "description" content = "Simple app using web bluetooth to connect to a remote heart sensor">
        <meta name = "viewport" content = "width=device-width, initial-scale=1">
        <link href="./style.css" rel="stylesheet">
    </head>

    <body>
        <button id = "connectButton">Connect</button>
        <p id = "dataText"></p>
        <img id = "heartSprite" src = "./heart.png" />
        <script src = "./script.js"></script>
    </body>

</html>
Some additional CSS:
#connectButton {
    cursor: not-allowed ;
}

#heartSprite {
    width : 64px ;
    height : 64px ;
}
And a little bit of javascript:
var BPM = 0.0 ;
var heart = document.getElementById("heartSprite") ;
let p = document.getElementById("dataText") ;

if (navigator.bluetooth === undefined) {
    p.textContent = "Web bluetooth is not supported" ;
}
else {
    let button = document.getElementById("connectButton") ;
    button.style.cursor = "pointer" ;

    handleCharacteristicValueChanged = (event) => {
        let value = event.target.value ; // a dataviewer object is provided by the object event
        let heartrate = value.getUint8(1) ; // we select the eight bytes that contain the heartrate informations
        p.textContent = heartrate + " BPM" ; // and display it
        BPM = heartrate ;
    }

    onClickEvent = () => {
        navigator.bluetooth.requestDevice({ filters: [{ services: ['heart_rate'] }] }) // we filter the devices, displaying only those with heartrate services
        .then(device => device.gatt.connect()) // after the user select a device, we return the selected one
        .then(server => server.getPrimaryService('heart_rate')) // we get the service
        .then(service => service.getCharacteristic('heart_rate_measurement')) // then the characteristics
        .then(characteristic => characteristic.startNotifications())
        .then(characteristic => {
            characteristic.addEventListener('characteristicvaluechanged', handleCharacteristicValueChanged) ; // then we subscribe to the characteristic notifications
        })                                                                                                    // and set the callback function
        .catch(error => { console.error(error); }) ; // we display the errors on the console
    }
    button.addEventListener('click', onClickEvent ) ;

    let startTime = performance.now() ;
    let step = 0 ;
    updateHeartSize = () => {
        if (BPM > 0)
        {
            let ibi = 60./BPM * 1000 ;
            let elapsedTime = performance.now() - startTime ;
            let scaleUp = 1.1 ;
            let scaleDown = (1/scaleUp).toFixed(2) ;

            if (elapsedTime < ibi * 0.05 && step == 0 )
            {
                step++ ;
                heartSprite.style.transform = "scale(" + scaleUp + ")" ;
            }
            else if ( elapsedTime > ibi * 0.05 && elapsedTime < ibi * 0.22 && step == 1)
            {
                step++ ;
                heartSprite.style.transform = "scale(" + scaleDown + ")" ;
            }
            else if ( elapsedTime > ibi * 0.22 && elapsedTime < ibi * 0.26 && step == 2)
            {
                step++ ;
                heartSprite.style.transform = "scale(" + scaleUp + ")" ;
            }
            else if (elapsedTime > ibi * 0.26 && step == 3)
            {
                step++ ;
                heartSprite.style.transform = "scale(" + scaleDown + ")" ;
            }
            if (elapsedTime > ibi)
            {
                step = 0 ;
                startTime = performance.now() ;
            }
        }
        globalID = requestAnimationFrame(updateHeartSize) ;
    } ;

    let globalID = requestAnimationFrame(updateHeartSize) ;
}
Voilà!
Check the source code on https://github.com/UlloLabs/tutorial.HR-WebBLE/ and see the result on https://ullolabs.github.io/tutorial.HR-WebBLE/.