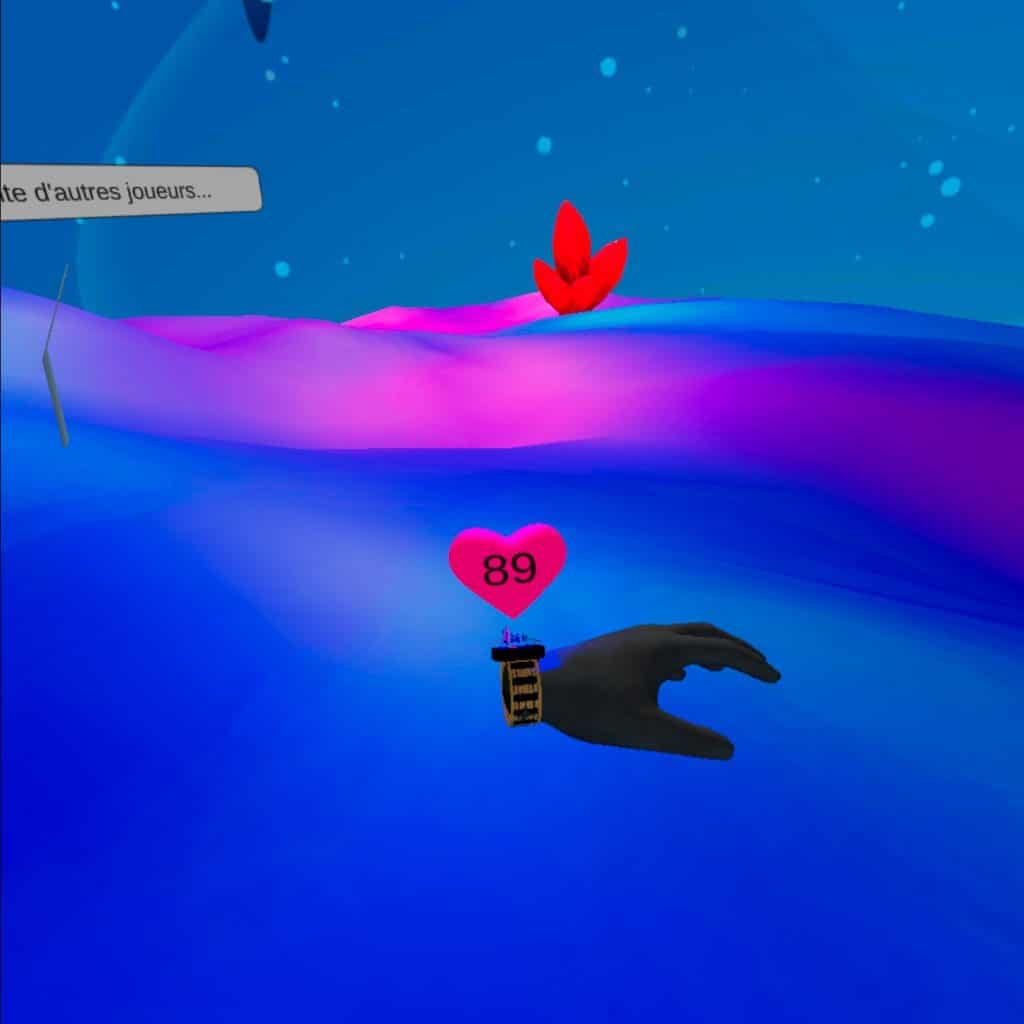
With ARVatar, you can join an augmented reality portal that plunges you into a magical open world. You can find flowers linked to your heartbeat for heart synchronization.
Multiplayer ambient version :
With the multiplayer version, you can join a peer and move your heart wherever you like in your environment. Relaxation and breathing are the watchwords of this application.
Through such demonstration we aim at bridging our various prototypes, exploring multiple modalities.
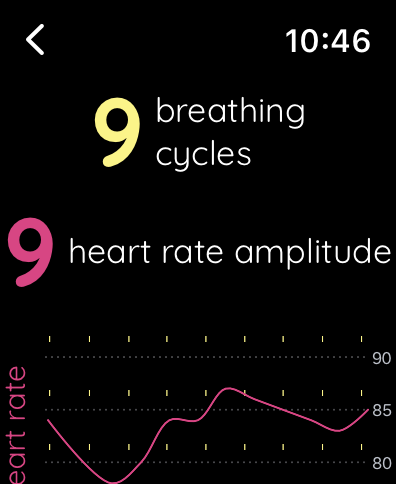
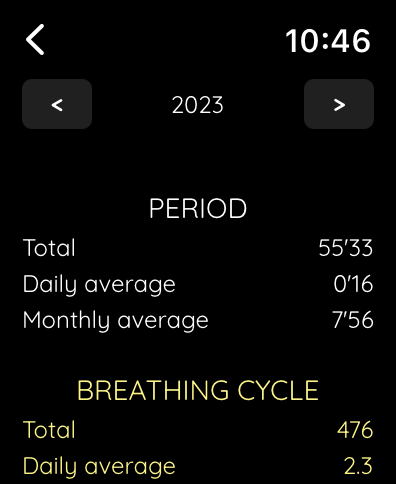
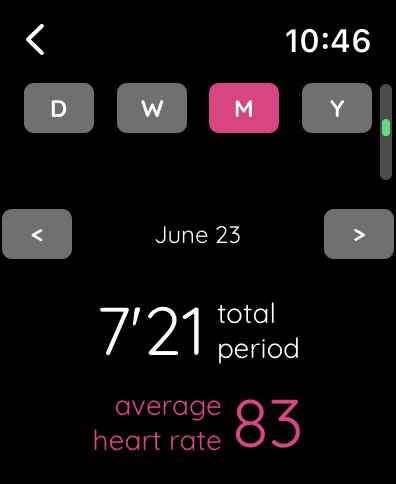
Flow is an Apple Watch application for relaxation, where you can do breathing exercises to control your heart. The app provides two breathing exercises, one where your heart controls the breathing cycles, the other where you pick a fixed breathing cycle duration. You have a complete feedback of your use of the app, with dashboards for each day, week, month or year. You can see charts with your average amplitude, your average number of breathing cycles or again the time you spent on the app. You can also find in the app an AMA section, with responses to all questions you can have about how does this work.
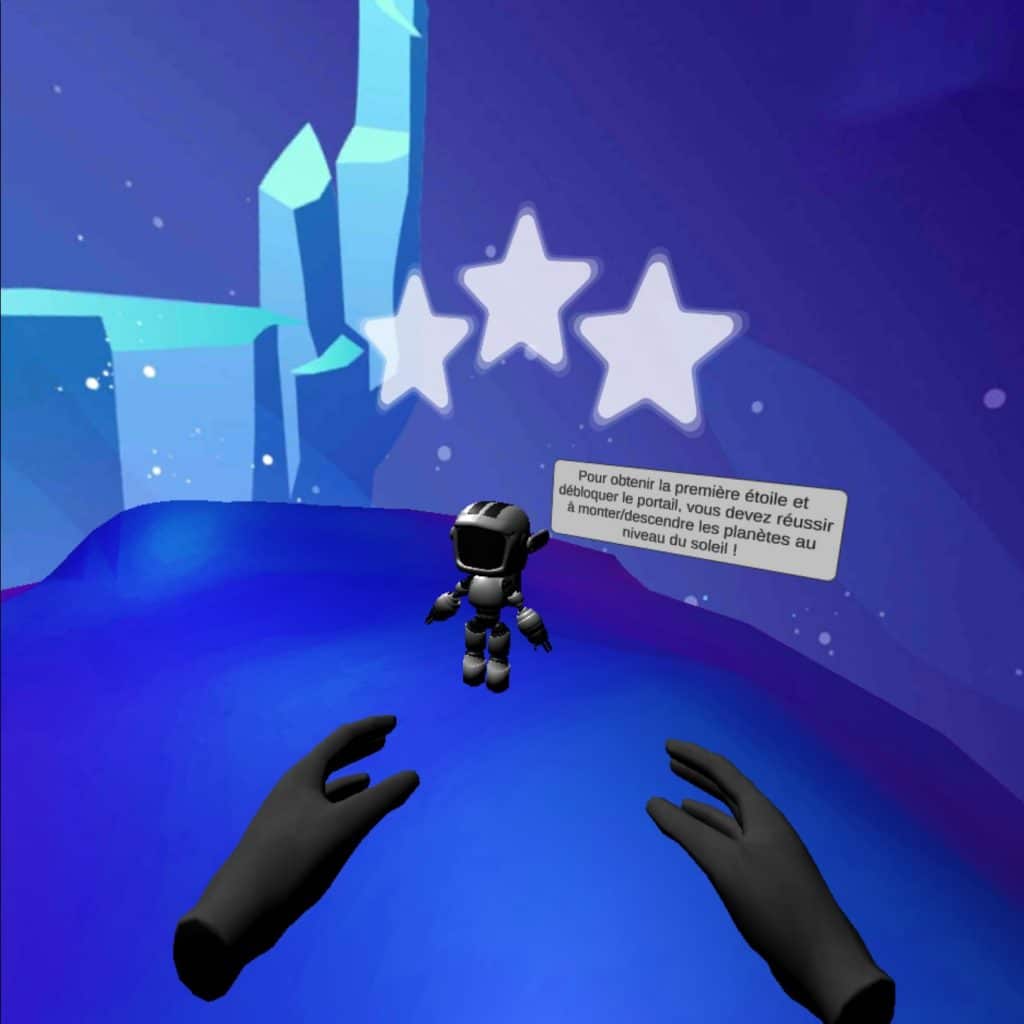
Cosmos VR is a shared experience where multiple users can complete quests together in a virtual reality world. They can observe a biofeedback of their heart-rate activity as well as that of others, represented in various ways. All quests are based on biofeedback, users have to try to regulate their heart-rate activity to accomplish them.
How work Cosmos VR?
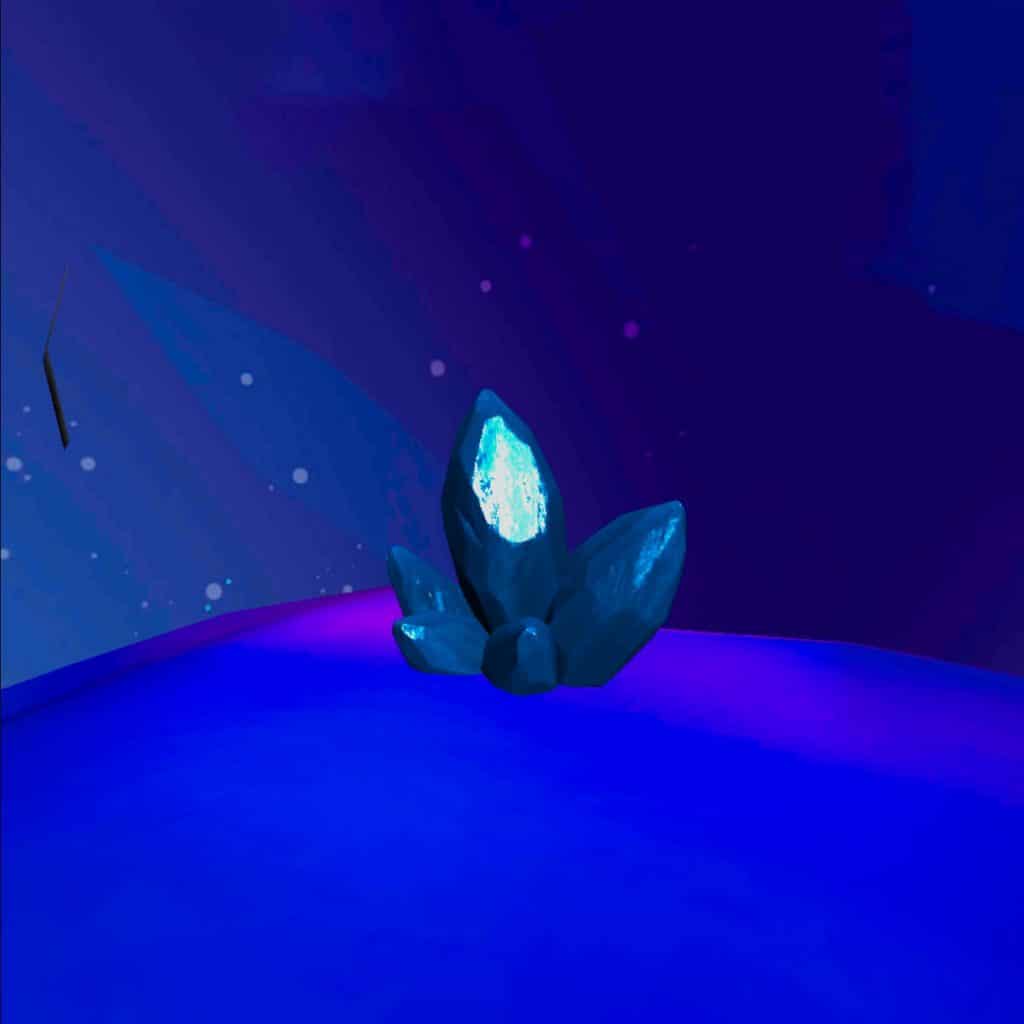
This project was made with Unity for Oculus Quests, and it requires a smart watch to get user’s heart-rate. In the video presentation, the aim of the quest is to make an eclipse with the planets. Each player controls a planet with his heart-rate, and the higher the heart rate, the higher the planet. Moreover, the further apart the players’ heart rates are, the further away the planets are from the sun. So, to accomplish this quest, each players’ heart rate have to be around 70 BPM (beats per minute). To make this possible, the player have to learn how to regulate his heart rate, for example with its breathing. This is why, in this virtual reality world there are ‘breathing crystals’ with changing luminosity, and the players can follow the crystals with their breathing to regulate their heart rate.
One of the objectives of Cosmos VR is to teach users that we can quite simply regulate our heart rate, and how to regulate it, for example with our breathing.
Another objective is to use virtual reality to represent physiological data, with an ambient biofeedback for the user.
Why does this project appeared ?
This project is an extension of Cosmos, we wanted to use virtual reality so that the user is fully immersed, completely concentrated to take the control of his heart rate. In addition to this, the player have a goal, quests to accomplish, so he really want to regulate itself which makes it easier.
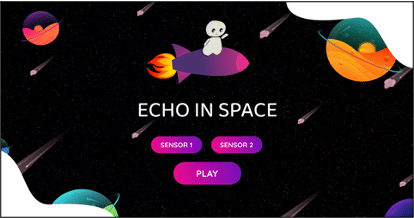
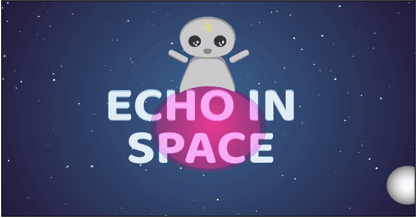
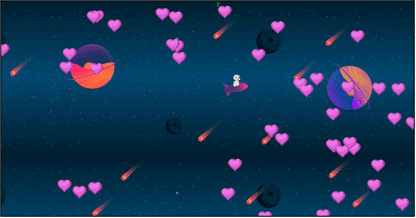
Echo in Space is a shared experience where two players can control Echo traveling the space by their breathing. The objective is to catch as many hearts as possible, and to avoid meteorites ! The first player controls the position of Echo (an inspiration and Echo goes up, an exhale and Echo goes down). Moreover, if there is a second player, he can controls the speed of Echo (the faster his breathing, the faster the Echo).
This game has been developed by a team of 5 (3 developers and 2 designers), in 3 days during a Game Jam. The programming language used is JavaScript, and we used PixiJS, an open-source library. The breathing of each player is recovered by a sensor (a breathing belt) who sends data using Bluetooth.
MenuIntroGameplayGame captures
Finally, the aim of this game is to become aware of your breathing, that you can completely control it and that it affects many things, such as your heart rate, your focus and so on. Moreover, the players can have a real-time biofeedback of their breathing, and they can try to modulate it in a playful way in conjunction with a peer.
Have you ever dreamed about controlling music with your brain? MusicEEG is an online application that allows you to listen to music and add filters that can be controlled by the electrical activity of your brain. You can even experience the app with someone else, choosing which brain and which EEG frequency band controls which sound filter. A combined chart of the real-time measurements is displayed in the middle for control.
This application was created for the sound week of UNESCO 2021, and it was presented on the 7th, June 2021.
You can test this project here (only with browsers supporting Web BLE, such as Google Chrome and derivatives), you need to have at least one Muse headset.
Since this demo we developed our own library to generate sounds and soundscape, soon to be released.
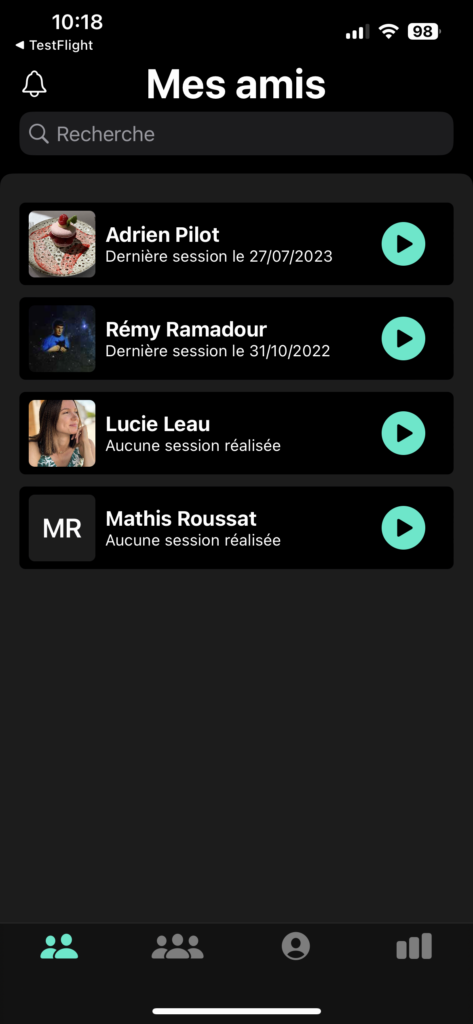
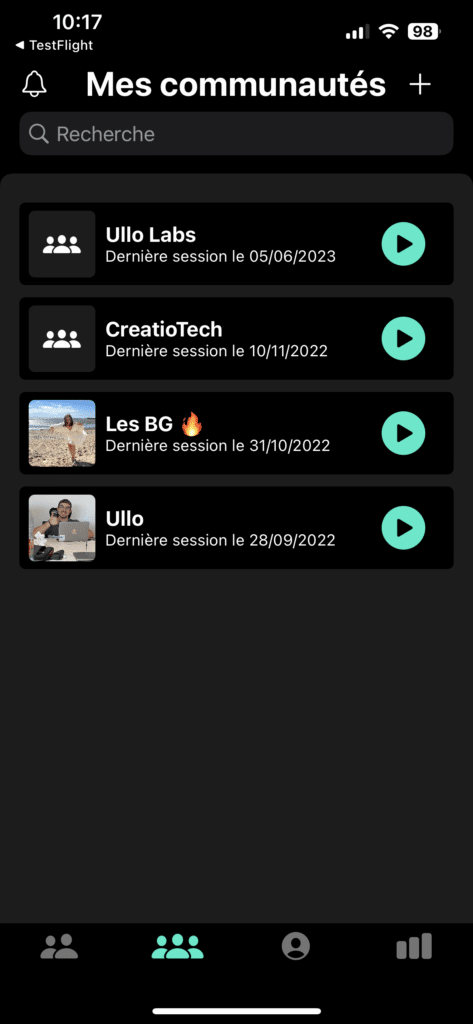
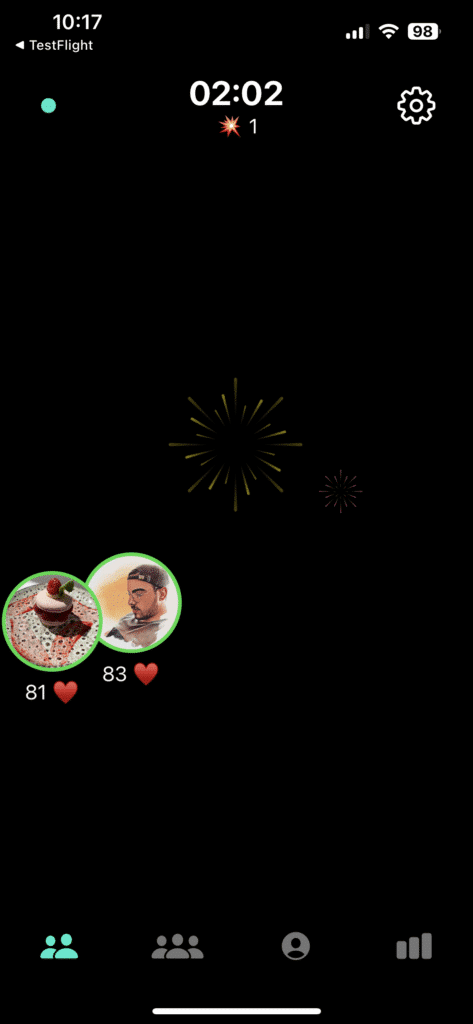
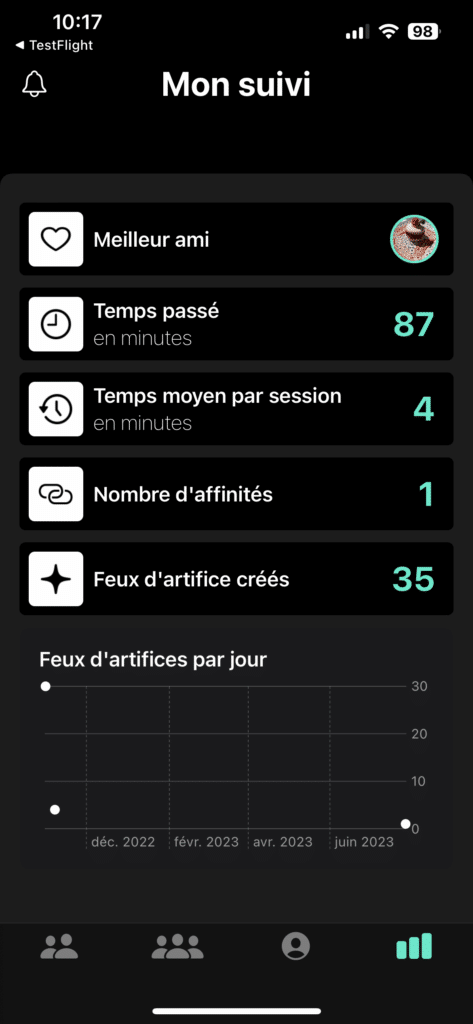
Harmonia is an iOS application with an Apple Watch companion. The aim is to connect your self with your friends or colleagues and achieve heart synchronization. Like a social media, you can add new friends, create communities and edit your profile. You can also see dashboards about your app usage, your friends, or the time spent on the app. The app work with a system of session (with a friend or with a whole community), and during a session you can follow a breathing guide in your Apple Watch.
The app provides features like notifications, or dark mode to personnalise your user experience.
It is currently in closed beta, don’t hesitate to contact us if you want to try it out 🙂
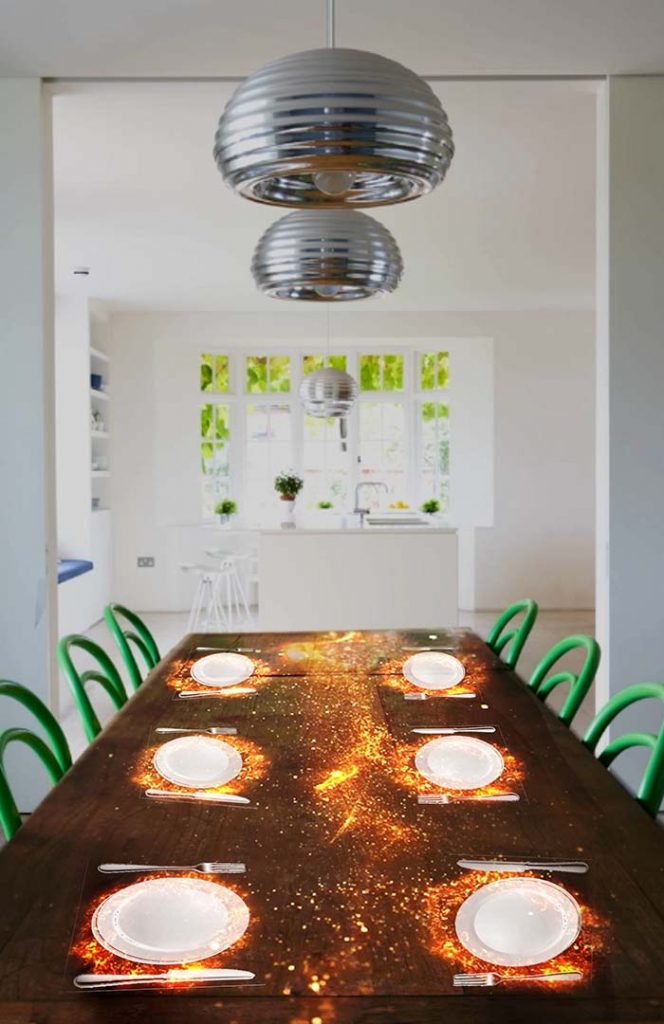
The Dinner of Lights is a projection system that uses animated scenes surrounding the plate to improve the multisensory dining experience of the patients and to initiate the adaptation to a healthy diet at their own pace. Offering a variety of sound and light stimuli anchors one in a sensory bubble that provides soothing, pleasure and nourishment.
This system avoids stigmatizing and labeling the participant’s appetite status and gently encourages him or her to eat. The visual themes can be easily adapted for children, adults or seniors. It creates social interaction through animations that link people together through movement. It also reinforces the multisensory intensity of the meal (tactile, visual, auditory, olfactory, gustatory senses) and allows a moment of relaxation while eating in poetry.
Tabletop projection is already implemented in stimulation and care products, notably for the elderly with the interactive tables created by Tovertafel. In the field of alimentation, the use of these technologies is mainly directed to the luxury market. Our wish is to make healthy eating more accessible and to encourage it.
Our main sources of research with this system concern undernutrition of the elderly, hospital alimentation and eating disorders.
“The projection that was playing resonated with me, inspired great emotions, and it made it easier for me to eat that chocolate dessert. “ An eating disorder patient on July 21, 2021
In order to respect the confidentiality of the current studies with medical partners, here is another example of our projection system applied this time to an audience of children to immerge them in an imaginary world during the afternoon snack.
The idea was to create a device dedicated to a public of children from 5 to 11 years old. The idea was to create a projection surrounding the meal, where dragons recognizable by each child, would grow up as the meal progressed. The graphics had to be simple, attractive and easily distinguishable during the projection. Each dragon had a particular colour so that it could be easily identified by the child as his or her own.
The dragons would smile, stick their tongues out, breathe fire to warm the child’s plate, fly, play with the other dragons and play around his plate. This type of animation allows a real collaboration between children and encourages communication and trust by having two avatars representing them mingle and play together. This encourages empathy, identification and conversation.
Last week the BCI Meeting was held, the major international conference on brain-computer interfaces. As with many other conferences, this edition was the first to be held virtually (with great results, organizers managed to maintain the interactivity between participants, one of the main reasons for a conference to be held in the first place).
Jelena Mladenović presented there our work on the effect of a biased feedback during a motor imagery BCI task. During the experiment, participants had to control a racing game by imagining right hand or left hand movements. Depending on the recognized brain pattern, the character would go either left or right, catching fish. I must mention at this point that said character is a hungry pingouin, Tux from Extreme Tux Racer.
Glimpse at a BCI Tux racing game (with an over-enthusiast participant)
There was three conditions during the experiment: the position of the character could be either positively biased (it was easier to reach targets), negatively biased (harder to to do), or there was no bias (control condition). The main outcome of the experiment is that depending on users’ profiles (e.g. if they are prone to anxiety), the bias could be either helpful or detrimental in terms of performance, learning or flow (an optimal state we can get into while fulfilling a task).
We are in the process of publishing the full paper, if you want to know more about the study the preprint (the version before peers review a paper) is available at: https://hal.inria.fr/hal-03233170.
You can also watch her 10 minutes talk summarizing the study right here:
Jelena’s talk during the vBCI 2021 conference
With this talk Jelena was awarded with a Best Presentation award − in the “non-invasive” category, because in this conference these is also cutting-edge research on invasive techniques, see all the abstracts.
This work was done in collaboration with Jérémie Mattout from Inserm (CRNL COPHY team) and Fabien Lotte from Inria (Potioc team), and we hope to continue our investigations in the foreseeable future (this is already our second study on the topic, previous publication here).
Teaser: we also used the data gathered during this experiment to investigate if it would be possible to automatically select the best bias over the course of a BCI application. And it looks like it, even with a simple selection algorithm. Check Jelena’s thesis for first insights (while the whole piece deserved to be read, this particular subject rests in chapter 5).
Fancy open-source game engines? Godot is among the main alternatives to the big names such as Unity or Unreal engine. Compared to the latter, Godot is free and comes with a MIT licence attached. Although tt is not on par in terms of functionalities and optimizations and you might not use it for creating the next triple A game, it still has plenty to offer. Godot comes with examples for desktop or mobile apps, it can do AR or VR, there is a physics engine for 2D or 3D scenes, you can use it to program shaders like grown-ups. Most of all, Godot can run on the Raspberry Pi and projects can embed Python code. With some hacks, that this tutorial is about.
The first part covers a basic Godot tutorial, using a python script to fetch data from the network and control a sprite. Part two dwells in more technicalities to (force) assemble python and the aarch64 Raspberry Pi.
The use-case will be to animate a cube with signals coming from the Lab Streaming Layer protocol (LSL for short). In the past years LSL has been widely adopted in research and among hackers to exchange physiological data between programs and between computers. It is a network protocol that ensure precise synchronization between streams, a must-have when dealing with signals such as EEG. More often than not there is a bridge between the acquisition devices and LSL, either from the manufacturers (e.g. Brain products, Emotiv, Neuroeletrics, OpenBCI) or from the community (e.g. Bitalino, Muse, generic BLE smartwatches) − more extensive list here. LSL is also supported by several program aimed at real-time signal processing, that you can transparently incorporate between the raw signals and your application (e.g. OpenViBE, Timeflux), and many tutorials exist around the web, including one dealing with Unity if you want to stick with the cool kids. For the sake of the tutorial we will use generated data so you don’t need an actual device to follow through.
LSL comes with various bindings (C, C++, C#, Java, Python and so on). Beside C and C++ there are no “pure” implementation of LSL, meaning that all bindings rely on a native library, which has to be compile against each target platform (also a reason why at the moment a browser implementation is problematic). Godot main programming language is GDScript, developed especially for it. It is fortunately possible to incorporate external library through GDNative. Because Godot is in the process of integrating C# as a second scripting language, the easy solution would be to use the C# LSL binding for our project. Easy is no fun, and despite C# existing code base, for learners as well as in the research community Python is king, with many libraries in signal processing, image processing, statistics, audio, and so on. Hence the objective will be to harness the power of Godot with the flexibility of Python.
We are lucky, an unofficial and yet active project exists to do just, that godot-python. There are some caveats in terms of packaging, that we will tackle later on; apart from that it just works, you can interface Python code with the scene in Godot, to control objects for exemple, and several languages can co-exist in the same project. Godot-python relies itself on another project to provide a standalone Python environment: python-build-standalone. A standalone Python can be shipped alongside the Godot project to run on final user’s computer, and it will not interfere with any Python installation present on the system. All is fine, then? Almost. Remember the premise, aiming at running the software on a Raspberry Pi? Those single board computers are tiny and cheap, perfect to lower the entry barrier for computer science and, here, disseminate biofeedback applications. Except that it relies on a different CPU architecture than traditional PC, ARM (as the newer Apple M1) instead of x86.
We are again lucky (or, more accurately, we can benefit from a positive open-source ecosystem), an unofficial and yet active project exist to facilitate ports of Godot to such machines: FRT. There is a second project more focused on the Raspberry Pi, but it does not seem to support GDNative (hence third party libraries such as LSL), so we will stick with FRT. Even though FRT does not aim at providing the Godot editor (the environment used to program the application), it provides scripts and binaries for running the Godot platform, the component use to run the application. Think of this second binary as an “interpreter” for the scenes created in Godot. When a project is being exported, the interpreter specific to the target platform is packed with the scenes, assets and scripts.
On the one hand we have godot-python to run python code within Godot, on the other hand we have FRT to run Godot on the Raspberry Pi, all is fine, then? Almost. Never before godot-python ran on Raspberry Pi (or an any ARM system for what matters); we are about to change that.
The tutorial is tested on a Raspberry Pi 4 (2GB RAM), with Raspberry Pi OS (2020-08-20), itself a derivative of a Debian Buster 10.5. Programming within Godot Editor occurred on a more regular laptop, an ol’ (k)Ubuntu 16.04 x64.
Part 1: Python and LSL in Godot
In this first step, we will create our scene in Godot, install and configure Python so we can retrieve LSL signals, animate an objects with it.
First sprite
First things first, grab the Godot editor for your (desktop) platform (tested with release is Godot 3.3.2). You can save yourselves the extra space taken by C# and Mono integration and download the ~35MO of the archive (did I mention that Godot is very lightweight? Pleasant change compared to competitors). Note: if anyone reproduce this tutorial with the Mono version and run Godot plus Python plus C#, (“Godot babel”?), feedback is welcomed.
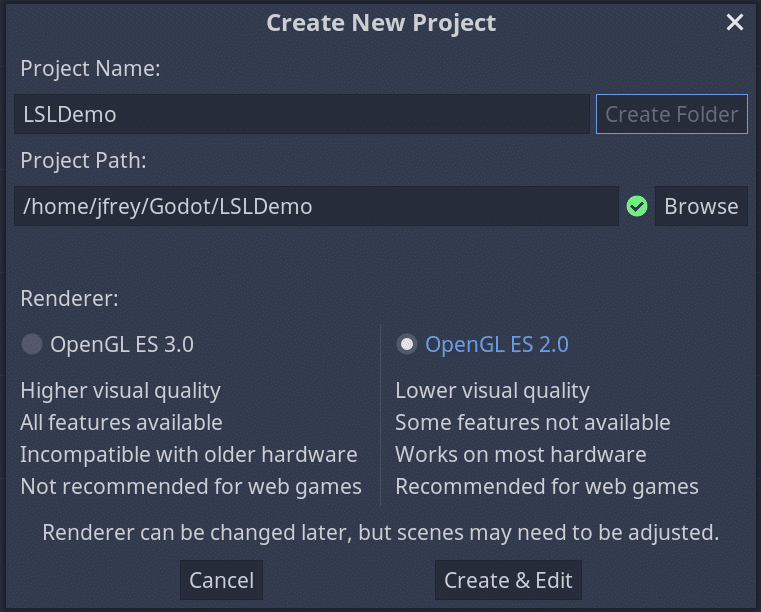
One binary in the zip file, launch Godot and start with a new project. Select “OpenGL ES 2.0” as the renderer, ensuring better compatibility with the Raspberry Pi we will use later on. Lacking inspiration when it comes to titles and names, the project will be called “LSLDemo”.
Creating a new Godot project
Other tutorials dedicated to Godot will to a better job at guiding you in creating a 3D project, for the sake of simplicity we will stay two dimensional on this one. Click on “2D scene” on the left-hand sideo of the window to create the root node of the scene. You will switch to a 2D plane in the main view. Right click on the Node2D root node, “Add Child Node”, look for and select “Sprite” in the list, an element used to represent a character or an object that can move on screen. We will associate an image to it. It can be anything, because we will have it turning and turning around, let’s download a PNG of a Bee on Wikimedia. Direct access to 320×240 version here. Save the PNG file on your disk. To add the image to the list of ressources available to the project, drag and drop the image file in the editor window. You should now see the image appear in the bottom left dock under the main folder res://.
To associate the image to the sprite, selecting the Sprite node, click on the “Texture” property situated on the left-hand side of the editor (at the moment marked “[empty]”) and select”Load” in the drop-down menu. A window will appear listing all the resources, including the bee image, select it, validate your choice and close the menu with “Open”.
Let it bee the first sprite!
Now is a good time to safe your scene, (“Scene”, “Save Scene” or the obvious Ctrl+S shortcut). Scenes have the tscn extension, we will only have one, let’s name it… “main”. Launch the scene to see how it looks for now (pres “F5” or click on the “play” arrow on the upper right). Godot will ask you confirmation that current scene is the main scene (it needs to point to one scene upon launching the game). In the new window, that shows what players would see upon lauching the game, only part of the sprite will be displayed. Indeed, by default the sprite was centered around the (0, 0) coordinates, and by convention the origin is the upper left corner of the screen. Go back to the editor, ove the bee so that you can see its entirety, either using the mouse (left click, drag and drop) or by changing the “Node2D” property of the sprite. You can also scale the size of the sprite or rotate it.
Installing and testing godot-python
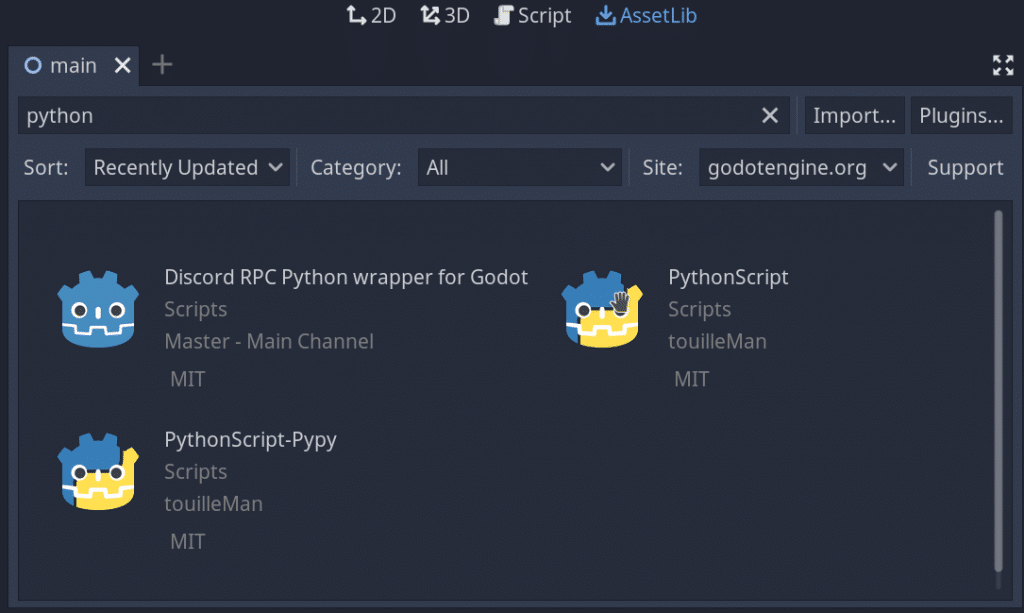
On desktop and within the editor the simplest solution to install godot-python is to download it from the “AssetLib” tab (upper part of the screen). Search for “python” and pick “PythonScript”. It’s version 0.50.0 as for now. Select, click on “Download” in the new window, wait for the file to download in the AssetLib tab, click “Install” once done. The asset weights about 100MB as of v0.50.0, it contains the whole Python ecosystem for the four supported platforms. Upon installation, in the file list, you might want to un-check platforms you don’t plan to use during development and only keep yours (e.g. pythonscript/x11-64 for Linux), but it won’t hurt to keep everything. Wait for the asset to uncompress. It will reside in the addons sub-folder of the Godot project. As per instruction, you must close Godot and relaunch the project for godot-python to be properly installed. Do that, save if asked to.
python-godot is avaible from the AssetLib tab under the name PythonScript
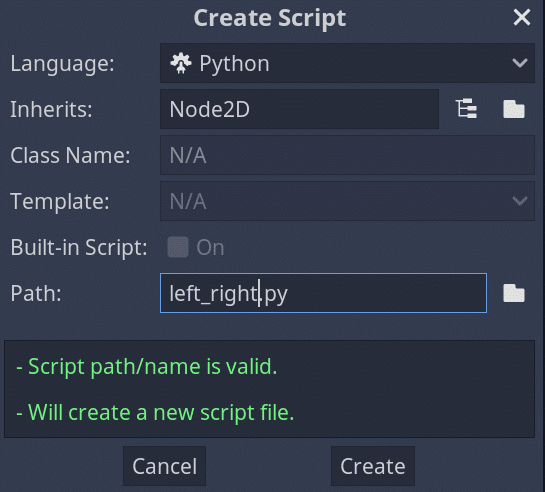
To test the Python environment, go to the “Script” tab, click “File”, “New Script…”. Similarly to other engines, a script in Godot is attached to an object (a node). This one will change the position of the sprite, which is a property inherited from the “Node2D” class, that you will enter in the “Inherits” field. After setting the name of the script (here left_right.py, as we will translate the sprite back and forth), hit “Create”.
Creating a test python script
The python script comes with a default code. There should be one method _ready(), which will be called upon initialization of the class. The ready() method of each class will be called upon loading a scene, any blocking call here will delay or freeze the spashscreen when you first start the game. The should also be two class variables at this stage. For example a = export(int) declare a (integer) variable that will be accessible within the editor, very handy to easily set parameters to different nodes even if they share the same script. In our first code we will use an “exported” variable to set the speed of the sprite. To update the sprite we will need to add a new method _process(), that will be called upon each rendering loop by the engine. The python layer expose various variables, including the current position of the sprite. The idea is to save the initial position upon launch, and move the sprite from left to right with a configurable step between each loop. Coordinates will be handled through the Vector2 object and we will use a direction flag to switch from left to right. Borders will be hard-coded, let’s be a bit dirty. Simple enough to check that python runs correctly. The full code left_right.py is as follow:
from godot import exposed, export, Node2D, Vector2

@exposed
class left_right(Node2D):

	# translate node that many pixel each loop, variable exposed to editor.
	step = export(int, default=10)
	# initial position of the node
	init_pos = Vector2(0,0)
	# flag to switch from left to right
	direction = 1

	def _ready(self):
		"""
		Called every time the node is added to the scene.
		Initialization here.
		"""
		# save initial position
		self.init_pos = self.position

	def _process(self, delta):
		"""
		Called for each rendering. Main code here.
		"""
		# when the node goes to much on the left or on the right, revert direction
		if self.position.x > self.init_pos.x + 100:
			self.direction = -1
		elif self.position.x < self.init_pos.x - 100:
			self.direction = 1
		# apply translation change
		self.position += Vector2(self.step * self.direction, 0)
To associate the script to the sprite, within the editor drag and drop the file to the Sprite node (or right click on the Sprite node, select “Attach Script”, choose Python and select existing file). There are many area of improvements, for exemple delta could be use to smooth animation even if the framerate varies, but if you launch the scene, you should see a buzzing bee. Note that fore some reason the variables exposed by the Python script are not updated in the editor before you restart the project (“step” will not appear in the “Inspector” dock on the right). One bug, probably more to go.
Controlling a sprite with LSL
Those interested in next-gen biofeedack applications will have jumped right here. This time the objective is to fetch link the movement of the sprite with input coming from a LSL stream. To do that we will use one script to generate the data. This script is to be ran outside Godot, within your usual Python environment, or on another computer of the same network (Note: it should be possible to exchange signals through Internet as well, but it requires dwelling in LSL configuration, out of scope). If you never used LSL before, install it through pip: python3 -m pip install pylsl (possibly add the --user flag depending on desired scope). It should fetch the last version on desktop, 1.14 (which contains noticeable improvements in terms of CPU consumption compared to the previous ones).
Coordinates in a 2D space: two channels. To have the bee moving circles, sinus and cosinus of the same input. The simplest code to achieve this result (do not hesitate to grab more interesting bits from the official examples) to be included in a SendDataSin.py:
"""
Example program to demonstrate how to send time series to LSL
"""

import math, time

from pylsl import StreamInfo, StreamOutlet, local_clock

if __name__ == '__main__':
    # Sampling rate, on par with usual vsync framerate
    srate = 60
    # Identifier of the stream. Usually the name describe the device / model used, the type what data is being sent. Sticking with traditional examples values.
    lsl_name = 'BioSemi'
    lsl_type = 'EEG'

    # A stream info describe the meta data associated to the stream. We create two channels (x and y translations) of floats.
    # The last parameter is an ID that should be unique, used to automatically reconnect in case the stream is interrupted.
    info = StreamInfo(lsl_name, lsl_type, 2, srate, 'float32', 'myuid1337')

    # The outlet is the actual "pipe" outputing data, running in a separate thread
    outlet = StreamOutlet(info)

    print("now sending data...")
    # Infinity and beyond
    while True:
        # Prepare and send data
        mysample = [math.sin(local_clock()), math.cos(local_clock())]
        outlet.push_sample(mysample)
        # Wait before next push.
        # Note that relying on time.sleep to set the effective sampling rate (how many samples are sent per second) is sub-optimal, it will likely be slower and unstable
        # Check official LSL examples for a better way to steadily send data, e.g. compute how many samples are needed between two loops.
        time.sleep(1./srate)
There are many options related to LSL, the most important for performance being the buffer size (both on outlet and inlet) and the number of samples sent at once − check the well done documentation. If the system becomes laggy or unresponsive, the culprit is probably there. Run python3 SendDataSin.py and leave it live the big dream in the background. Now that we send data, we can take care to retrieve data within Godot.
First you need to also install LSL within the godot-python environment. Launch a terminal (we are still outside of Godot for now), and navigate to your Godot projet folder, e.g. LSLExemple. Still assuming that you are using Linux, Python binaries are located in addons/pythonscript/x11-64/bin (switch x11-64 for windows-64 or osx-64 accordingly to your situation). Most probably when the asset was installed the executable flag was not preserved. Fix that with chmod +x ./addons/pythonscript/x11-64/bin/* Now you can execute the standalone Python environment directly. Because the soft link were not preserved as well, we will have to aim at the exact Python version used (e.g. python3.8 rather than pyhton3). Install pip itself with ./addons/pythonscript/x11-64/bin/python3.8 -m ensurepip (you can also cd directly to the bin folder, I keep the path for clarity). Finally, as you did before with your own installation, to install LSL run ./addons/pythonscript/x11-64/bin/python3.8 -m pip install pylsl
On desktop not only pip will retrieve the corresponding .py files, but it will also fetch locally the .so library (or .dll or .dylib, each system its beloved extension). This subtlety will come handy in next part on Raspberry, because it won’t do that properly. Note that if you plan to use other libraries you will need to install them likewise, and you will have to do so for each target platform (there is no automatic process at the moment to do so). If you create another project, you can copy over the addons folder to keep all installed modules.
Now that everything is ready for Python to use LSL, head back to the Godot editor. Create a new script, still Pyhton, still inheriting from Node2D. Let’s call this one LSL_translations.py. The script will ressemble left_right.py, except that it will import the LSL module (you can import anything you have installed!) and fetch data from SendDataSin.py script. The translation will be applied to both X and Y axis.
from godot import exposed, export, Node2D, Vector2
from pylsl import StreamInlet, resolve_bypred

@exposed
class LSL_translations(Node2D):

	# magnitude of the applied translation
	factor = export(int, default=100)
	# initial position of the node
	init_pos = Vector2(0,0)
	# flag to switch from left to right
	direction = 1
	# LSL input stream
	inlet = None

	def _ready(self):
		"""
		Called every time the node is added to the scene.
		Initialization here.
		"""
		# save initial position
		self.init_pos = self.position

	def check_stream(self):
		"""
		Try to find the LSL stream on the network. Change predicate depending on target.
		WARNING: due to timeout option will block execution for the whole Godot engine upon each request.
		TODO: use threads to prevent blocking calls.
		"""
		if self.inlet is None:
			print("looking for stream init")
			streams = resolve_bypred("type='EEG'", timeout=0.1)
			if len(streams) > 0:
				# create a new inlet to read from the stream
				self.inlet = StreamInlet(streams[0])
				print("got stream")

	def _process(self, delta):
		"""
		Called for each rendering. Main code here.
		"""
		self.check_stream()
		if self.inlet is not None:
			# fetch data from inlet
			data, _ = self.inlet.pull_sample(timeout=0)
			# To maximize responsiveness, pull until last value in the buffer
			# Note: input with very high bandwidth might block forever execution here.
			while data is not None and len(data) >= 2:
				# expect two channels, translation from the initial position for X and Y.
				self.position = self.init_pos + Vector2(data[0]*self.factor, data[1]*self.factor)
				#print("got value: %s" % str(data))
				data, _ = self.inlet.pull_sample(timeout=0)
If you launch the scene and still SendDataSin.py is still running, you should see the bee hovering around its initial position. Well done! If you want to change the radius of the circle, tune the factor property (remember to restart Godot for any exported variables to be reflected in the editor the first time you add or change them). As indicated in the comments there some limitation and caveats with such simple code; we covered the basics, your turn to shine with actual physiological signals. Exporting the project (a toned down version of it due to the limitations of godot-python) is covered below.
It’s alive! Sending data from the network with LSL to a sprite rendered with Godot engine
Part 2: running a python Godot project on the Raspberry Pi
You mastered Godot, python and LSL. Next challenge: reproduce all of that on the single board computer. People only interested in having Python scripts with Godot on the Pi, welcome!
godot-python for Raspberry Pi and aarch64, long version
Godot-python needs to be modified to account for the “aarch64” platform that we will use (64-bit version of the ARM). The long route is to go back to the godot-python source and compile it on a Raspberry Pi. Fetch the source code, change lines in platforms/x11-64/SConscript, pythonscript/SConscript and site_scons/site_tools/cython.py to reflect that we update python-build-standalone from the Python 3.8 currently used to Python 3.9, for now the only version of Python supported by python-build-standalone on aarch64 Linux. Basically track down all “3.8” and “38” entries in those three files to substitute “3.9” and “39”.
Godot-python points to a python-build-standalone binary. Even by following carefully the instructions I did not manage to compile from scratch python-build-standalone (same symptoms as this bug issue), instead I retrieved automatic builds from its continuous integration (there is not yet official builds on the the “release” page). You will need to log in with a Github account to see the artifacts produced by the continuous integration. Fetch the output of the build of interest cpython-3.9-aarch64-unknown-linux-gnu, extract one of the tar.zst archive − I picked the version with optimizations enabled at compile time, suffixed “lto” −, place the archive in the file system and point godot-python to the right location by changing the variable PYTHON_PREBUILD_URL in platforms/x11-64/SConscript, pythonscript/SConscript, e.g. PYTHON_PREBUILD_URL = "file:///tmp/cpython-3.9.5-aarch64-unknown-linux-gnu.tar.zst".
The shorter route is to retrieve the patched code directly from our fork (in the future it will be a better option to create a dedicated version and merge changes back upstream to be in sync with latest modifications). Follow then the repository instructions to actually build godot-python. Compilation will still take hours, and stress the memory of the Raspberry Pi. I had to increase the swap size to its maximum for the compilation to success. To do that disable current swap sudo dphys-swapfile swapoff. Edit /etc/dphys-swapfile with your preferred editor (that would be Emacs and evil-mode), set CONF_SWAPSIZE=16384 and CONF_MAXSWAP=16384. 16GB of swap will take that much space on the SD card, check you have enough free space. Actually with these parameters we must hit a limit because on my system “only” about 12GB were allocated. And it barely sufficed to compile godot-python (I first tried and failed with both 2GB and 8GB) Allocate sudo dphys-swapfile setup and enable swap sudo dphys-swapfile swapon. (Best revert the changes after the compilation is done).
godot-python for Raspberry Pi and aarch64, short version
At this stage you have a Godot project (no need to change the beautiful scene you came up with in the first part) and a godot-python addon for the Pi. Next: Godot on the Pi. This step will be easy, FRT proposes binaries ready to employ on its sourceforge repo. You can of course recompile if you with some specific options or optimization; I went not there. Download the frt_100_332.zip archive of the 1.0.0 version (last one as of today, tested with a project made with, indeed, Godot 3.3.2). Extract, pick for the Raspberry Pi 4 the file frt_100_332_arm64.bin (arm64 is synonyme to aarch64). Note: if you aim at 32bit distributions, you are on your own! The FRT project contains information graphic driver available, head there if you want to optimize user experience, especially if you go 3D.
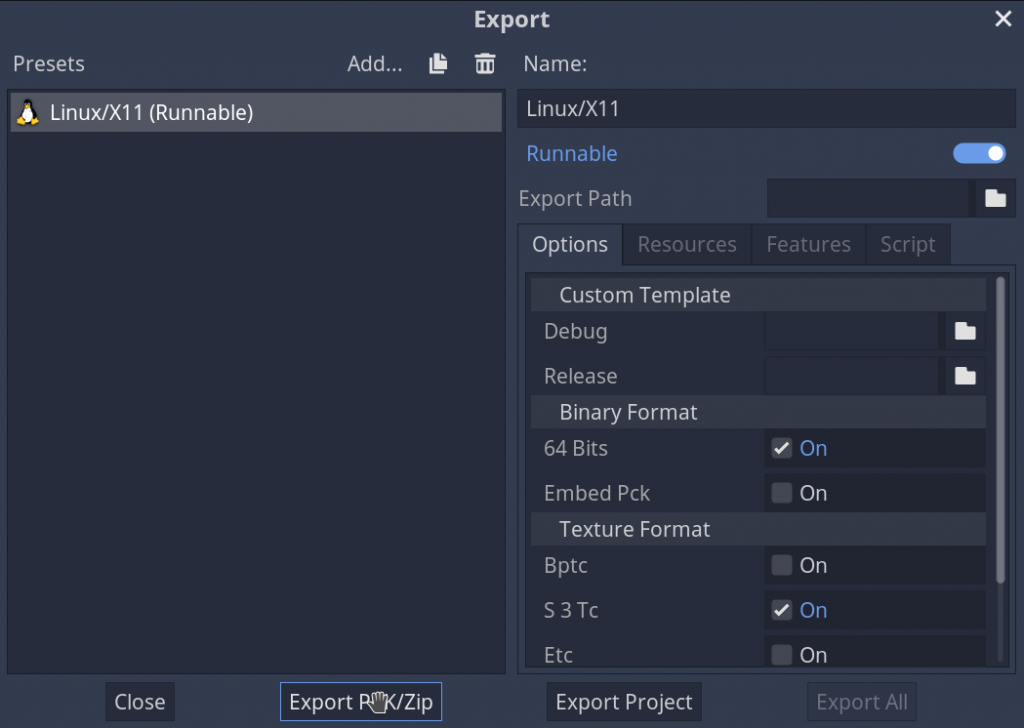
frt_100_332_arm64.bin will be your “interpreter”, or “launcher”, for the Godot project. A normal way to proceed would be to use this file as a template in the Godot editor to neatly package everything in one binary, cipher a bit, but godot-python cannot be packaged that way. Instead we need to export the Godot project as a Zip package. So we will just do that. On the desktop, in the editor, select “Project”, “Export…”. Add a a preset, select Linux/X11. You don’t have to touch any option, hit “Export PCK/Zip”. Enter a filename ending with .zip, e.g. LSLDemo.zip. Export to a location outside the project folder to keep it tidy.
Exporting Godot project as Zip archive
Transfer the zip file to the Raspberry Pi (I personally favor scp). Create a folder to hold your project, and extract the zip file in there. Do not make stupid mistakes like myself, such as erasing the .import folder (it is not decorative and you would loose like an hour getting over weird “ressource not found” errors). Copy frt_100_332_arm64.bin in the project folder. If you run the binary, it should detect the project automatically and try to launch it. It will fail because there is no addons folder at all in the zip file; except for pythonscript.gdnlib (the file indicating to Godot where to fetch the native library that is used as an interface with the standalone Python) the godot-python asset was not copied over during export. And even it it were, we would end up with the wrong architecture.
Importing custom godot-python to the project
In the previous episode the addons folder was obliterated. All hope in not lost: we happen to have retrieved a godot-python archive tailored for the Raspberry Pi. Extract godot-python-0.50.0+dev-x11-64_aarch64.tar.bz2 (it will be minus “aarch64” if you compiled it yourself) in the Godot project folder (reminder: the command line is tar xvf). It will create an addons folder with everything needed to run python in Godot, we are back on track. Because FRT declares a new platform upon compilation, we have to tune pythonscript.gdnlib so it can link our version of the Godot “interpreter” with our version of godot-python. Edit the file and under the section [entry] add the line FRT="res://addons/pythonscript/x11-64/libpythonscript.so" (you can leave the other entries). Now if you run ./frt_100_332_arm64.bin the program will start, the scene should load, but an error will be raised because LSL cannot load. Damn, we left it on the side of the road!
Note: on my system I am also spammed by messages about “ALSA lib pcm.c:8424:(snd_pcm_recover) underrun occurred”, probably some configuration to perform around ALSA or PulseAudio, you can disable audio altogether with the parameter --audio-driver Dummy
LSL: the last stand
To install LSL within the Python environment of our Godot project now on the Pi, we need to reproduce earlier steps. Namely, in the project folder on the Pi run ./addons/pythonscript/x11-64/bin/python3.9 -m ensurepip and ./addons/pythonscript/x11-64/bin/python3.9 -m pip install pylsl (notice the change to python3.9).
Did you think it would be enough? Of course not. Not only acute eyes will have seen that the LSL version downloaded on the Pi is an old 1.12.2 (and we do want this shiny 1.14, especially on the Pi), but even if you tried to go forward, you would face an error: current pip package of pylsl does not include a build for ARM. Hopefully this will be fixed in the future, in the meantime you need to grab the proper version.
Either retrieve the last stable release of the LSL sources, install some basic packages on the system to ensure compilation, such as build-essential and libboost-dev, run the standalone_compilation_linux.sh script and wait a couple minutes for the liblsl.so to be backed. arrive.
Or fetch directly the compiled file from there. No matter the solution, copy the .so file to the Python environment, overwriting the “faulty” file, e.g. in the project folder cp liblsl_aarch64_debian.so addons/pythonscript/x11-64/lib/python3.9/site-packages/pylsl/liblsl64.so (we mix a 1.12.2 API with the 1.14.0 library, not ideal but good enough for now, if necessary you can also manually update the python overlay).
[update] As of 22/05/05, latest versions of pylsl changed the way they look for the LSL library. They will try to load from the system install, not the local python install. If pylsl does not work for you on the Pi, with error messages related to the location of the library, here is a quick and ugly fix: force the installation of an older version that is still available on ARM: ./addons/pythonscript/x11-64/bin/python3.9 -m pip install pylsl==1.12.2 A better solution is for sure to install the compiled .so somewhere in LD_LIBRARY_PATH, I’ll have to test that, comments are welcomed if you do.
Now everything should finally be in place. If the SendDataSin.py script is running on the Pi (or on your desktop computer, should both machine be connected to the same Wifi), and if you launch the FRT binary (from ssh DISPLAY=:0.0 ./frt_100_332_arm64.bin), you should be met with excitation by the bee, happily circling forever after.
Conclusions
This is it, you tamed Godot, Python and LSL, conquered Raspberry Pi. The tutorial is still rough on the edges − finger crossed that it will become outdated soon, with Python and ARM officially supported in Godot at some point −, and yet it opens doors for creating quick prototypes. You can now add few assets, some lines of code and start creating environment that can respond in real time to physiological signals, plugging it to any screen or projector.
Plugging our breathing belt to Godot and Raspberry Pi
This tutorial is nothing more than gluing existing blocks produced by the community, thanks to those behind each one of them!
Do not hesitate to comment below or e-mail us if some instructions are unclear, if we blatantly missed something or if you cannot reproduce the tutorial. We do not aim at supporting the whole pipeline, but we will do our best to help. And if you produce something out of this page, we are also eager to know about it 😉
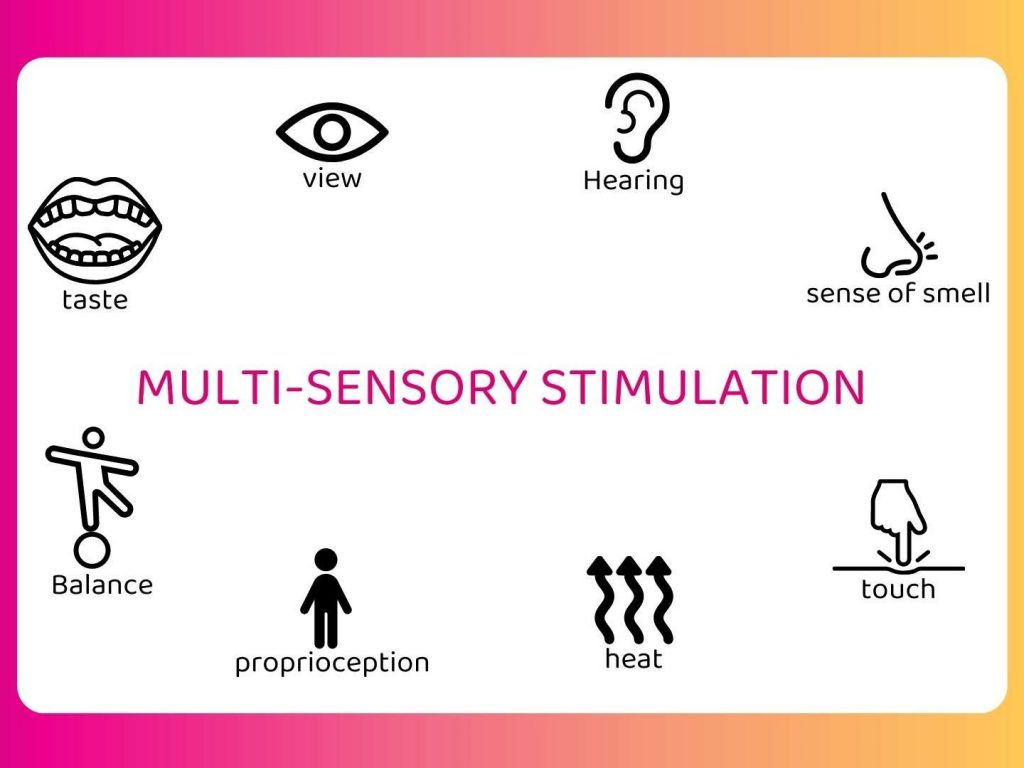
Multisensory stimulation encompasses all the approaches, devices and exercises that allow a person to be stimulated through two or more senses at the same time.
Well, here we go. For those of you who are curious, let’s go a little deeper into the subject.
First of all, which senses are we talking about?
Generally, at least two of the five basic senses are used (sight, touch, hearing, smell, taste) but not only. In fact, we have more than five senses, contrary to what we have been taught since we were children at school. To date, the scientific community agrees that we have nine senses. The four additional senses are: proprioception, which is the ability to know where our own limbs are located, equilibrioception, which is the ability to maintain our balance with the vestibular system located in the inner ear, thermoception, which is the ability to feel temperatures, and finally nociception, which is the ability to recognize pain. Thus, during a multisensory stimulation, our senses of proprioception, equilibrioception and thermoception can also be stimulated. For obvious reasons, nociception is not stimulated (Milgram did not go through this…).
Right… and concretely, how does our body process this multisensory stimulation?
When we discover an object, an environment, a notion, all our senses transmit information to our brain about this object, this environment, this notion. We integrate this object, this environment, this notion under different sensory modalities and it is the precise combination of these different information that will allow us to characterize and recognize more easily this object, this environment, this notion in its entirety thereafter. This is called sensory integration or multisensory integration. All this sensory information, transmitted to the brain via our nerve endings, then allows the brain to process perceptions in a multimodal way. Multimodal corresponds to the fact that the information on an object is transmitted according to several sensory modalities (tactile, auditory, visual, etc…) (1)(2). This multisensory integration also has impacts on high level cognitive functions such as attention (3) or memory (3b).
It should be noted that theories on sensory integration appeared in the 1960s in the United States with Ayres, an occupational therapist and doctor in psychology and neuroscience, and then by her successors (4). This theory became a trademark because Ayres developed a whole therapeutic approach based on it. This approach is mainly used by occupational therapists and consists of creating sensory-motor play situations to stimulate and progressively correct previously identified sensory integration disorders (5).
For the sake of consistency, we choose to use the term multisensory integration except when we refer explicitly to the approach developed by Ayres.
Two main categories of work have made it possible to objectify the effects of multisensory integration:
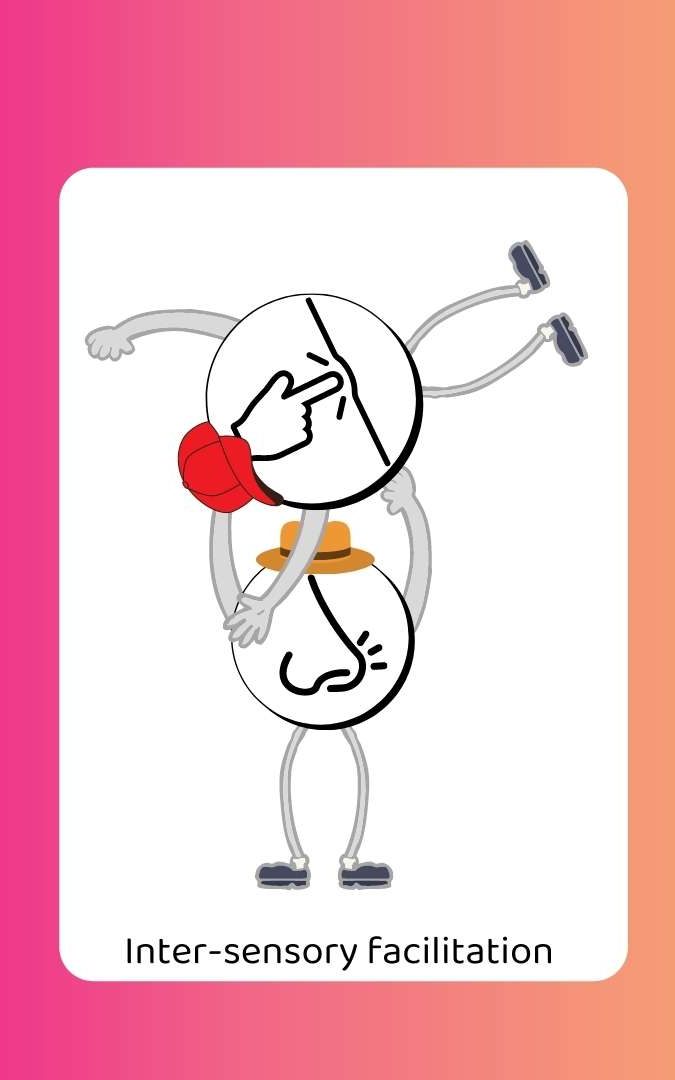
work on intersensory facilitation, which is “the study of the presentation of an accessory stimulus on the processing of a target stimulus of a different modality” (6),
and work comparing the processing of bimodal targets to that of unimodal targets (redundant target effect) (7).
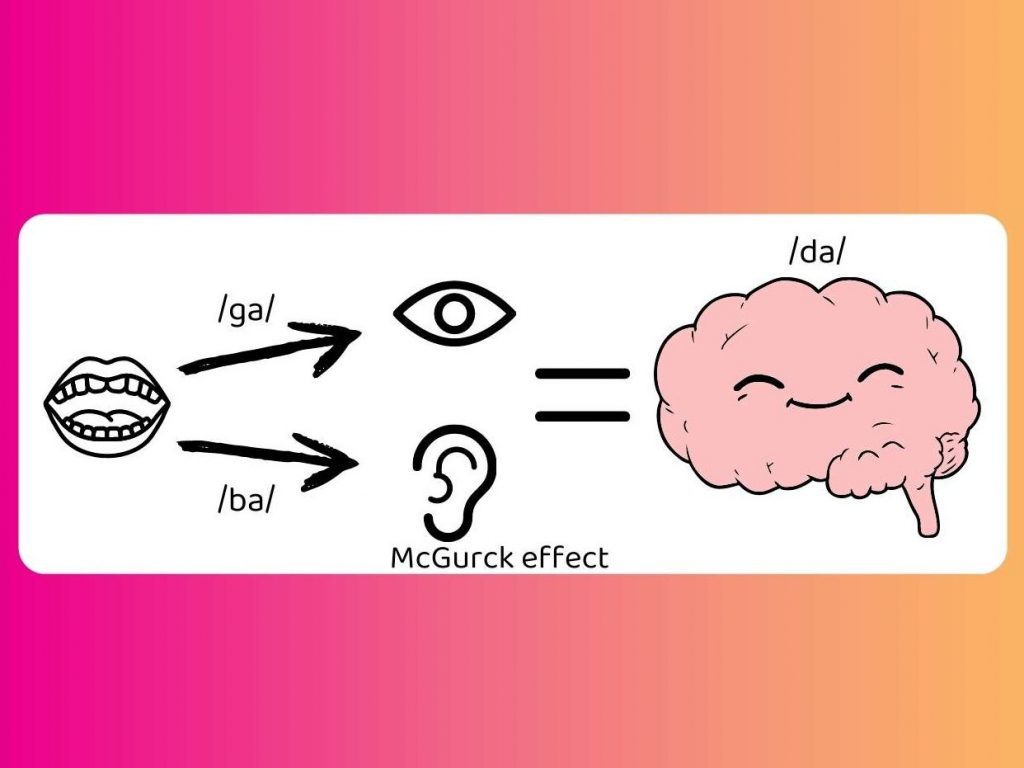
It happens that the information is not congruent and then one sensory modality will possibly take precedence over the others and thus lead to perceptual illusions:
McGurck effect, highlighted by McGurck and McDonald in 1976, which is the influence of the visual perception of articulatory movement of the lips on the auditory perception of speech (8). In this example when we see someone pronounce “ga” and we hear “ba”, we understand the syllabe “da”.
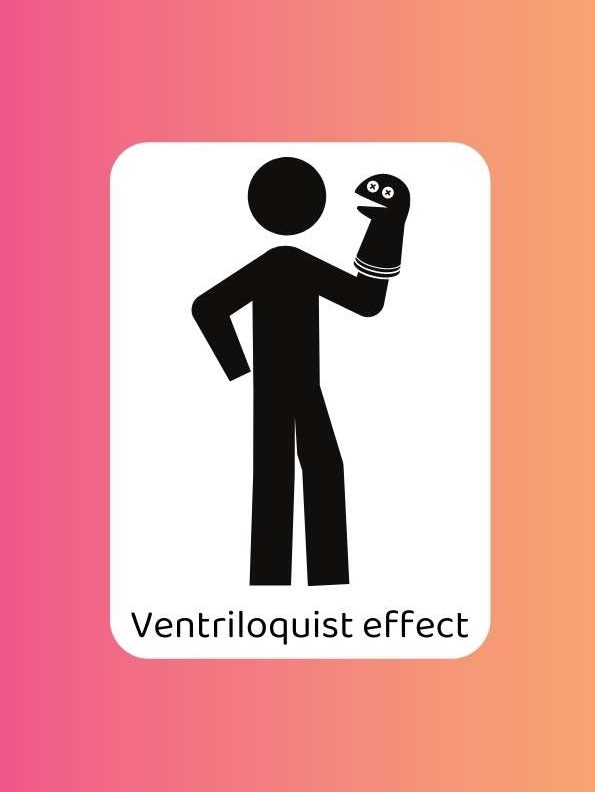
Ventriloquism where the perception of an articulatory movement of the lips can influence the judgment of the spatial localization of a sound source (Driver, 1996) (9).
Virtual reality where visual perception takes precedence over vestibular perception. When we see that we are on the edge of a cliff, we may feel as if we are falling while our body is sitting or standing. This incongruence can be more or less well supported and create a physical discomfort (nausea).
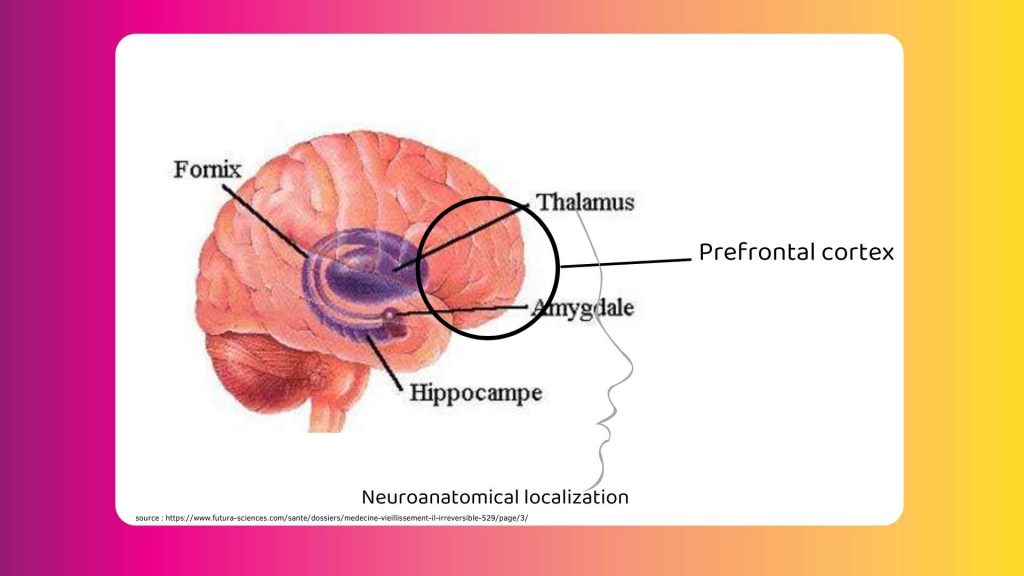
At the neuroanatomical level, in the literature, observations show that 3 structures of the central nervous system would be involved in this mechanism of multi-sensory integration:
The prefrontal cortex to maintain simultaneous activities in different brain areas (10).
The hippocampus in particular for the long-term encoding of links between the different sensory components.
The thalamus because, except for olfactory information, all sensory information passes through the thalamus before being projected into the neocortical areas of the brain. And conversely, from the cortical areas to the thalamus. According to some authors, it is these reciprocal activations that play a primordial role in multisensory integration (11).
That’s a little clearer, but why do we do multisensory stimulation if our senses are already constantly engaged?
In 1958, Liederman and his collaborators conducted a study on the consequences of sensory deprivation in participants (okay, that’s not better than Milgram). Very quickly after one hour, the participants showed agitation, anxiety, hallucinations and other discomforts. These manifestations disappeared as soon as they returned to a multisensory environment (12). This study highlighted the positive aspect of the multisensory environment. Our sensory perceptions have a key role in our relationship with the outside world (13).
Based on this, in the field of health, several approaches have been proposed and invented in order to accompany people and promote their well-being. Among the most widespread, there is the Ayres approach menitoned above and the Snoezelen approach which has also become a registered trademark.
The Snoezelen approach, introduced in 1974 by Jan Hulsegge, a music therapist, and Ad Verheul, an occupational therapist, comes from the contraction of two Dutch verbs, “snuffelen” and “doezelen”, which mean respectively “to sniff” and “to sleep”. It thus includes two approaches, that of sensory stimulation and that of bodily relaxation (14). On the other hand, the stimulating situation in a Snoezelen context is not seen as an attempt to teach a specific skill or a basis for simply offering rest and quiet, but as an opportunity to promote a general sense of well-being by engaging in pleasant and stimulating activities that do not produce any pressure and can be fully enjoyed (15).
In France, this approach began to develop in the early 1990s.
However, sensory stimulation has long been used to improve well-being as well as to develop thinking, as Montessori did in the early 20th century. Indeed, Montessori (1915, 1918) proposed a multisensory approach to prepare for reading that solicits visual and auditory modalities as well as the haptic modality. The latter makes it possible to make the link between spatial stimuli (perceived with sight) and temporal stimuli (perceived with hearing) (15b).
In a multisensory environment, the guiding principles of the intervention are: non-productivity, the person at the heart of the intervention, the person’s strengths, the importance of the therapeutic alliance, the importance of the climate, individual and personalized intervention, team cooperation (16).
The contributions of the multisensory environment shown in the literature are: reduction of problematic behaviors, improvement of self-awareness, increase in social interaction and communication, relaxation effect and reduction of anxiety, mood regulation and strengthening of the therapeutic alliance (17).
This approach allows caregivers to focus on patients’ interests, to legitimize the time spent with them and this has a positive effect on the relationship with their patients and also on their morale as caregivers. Indeed, multisensory stimulation proposes a less technical vision of care where the caregiver accompanies the patient, not directs him.
What are the fields concerned by multisensory stimulation? (non-exhaustive answer)
Among the fields concerned, there is obviously the health field but not only…
Currently, multisensory stimulation is more and more used in different care sectors such as adults with intellectual deficiencies, neurodegenerative diseases, children with learning disabilities, maternity, chronic pain management, psychiatry, post-coma awakening, rehabilitation, strokes or traumatic brain injuries (18).
In his article reviewing the clinical research on the Snoezelen approach used in a specialized residential setting with dependent persons, Martin (2015) notes that the results are varied, with however an improvement in emotional regulation, which favors relaxation and psychic appeasement. Such effect was observed with persons of all ages (children, teenagers, adults, elderly persons), who suffered an intellectual disability with associated disorders, a neurodegenerative disease, or psycho-behavioral and psychiatric disorders (19).
In the field of childhood and disability in particular, multisensory activities serve to increase the child’s level of multimodal integration, enabling him or her to overcome difficulties that might restrict the development of higher-level cognitive skills such as symbolic play, language, writing, reading and social understanding (20).
In the perinatal and early childhood field, multisensory stimulation is indicated for skin-to-skin care for premature babies in particular (20b).
Moreover, multisensory stimulation in a learning context improves cognitive abilities for both disabled students (ULIS class) and students in conventional schooling (21).
The study carried out by Baker and Jordan in 2015 shows that multi-sensory stimuli from the same source can help the development of cognitive abilities. Here, it concerns the representation of a quantity in infants and young children. The authors explain the results as follows: “When several senses are stimulated, they capture the attention of infants and children who select relevant information more efficiently and avoid external disturbances. This would increase engagement in the task” (22).
In the field of Human-Computer Interaction, multisensory stimulation is of great interest to facilitate immersion in a virtual environment by increasing the localization of the virtual self (23) or to facilitate the use of an application in particular when the person has a sensory disorder (24). Not to mention the sensory support devices that could be proposed to people with mental, cognitive, physical or psychic disabilities (TVSS type devices for visual-tactile sensory support) (25).
Okay, and in concrete terms, how does this happen?
Multisensory stimulation from an environment that solicits several senses or from a single object that stimulates several senses, can be done in many ways:
partial environmental adaptation (adaptation of a known environment with multisensory elements (classroom, dentist’s office, etc), or total (complete adaptation of a room dedicated to this use only (Snoezelen trademark room, multi-sensory space),
provision of nomadic devices offering several sensory stimulations (blanket, multisensory cart),
care, activities, devices offering the stimulation of several senses through a single object (balneotherapy, music therapy, zootherapy, art therapy, therapeutic gardens, digital approach, grapho-motor activities, etc).
We can provide multi-sensory stimulation for recreational, preventive or curative purposes. This is done to stimulate the motor, cognitive and social skills of the person. This approach can be used on a scheduled basis or in flash when the patient shows signs of agitation or discomfort, or at the patient’s request. Generally, the person must be accompanied by a professional who is aware of this approach. However, it can happen that the person is alone, it depends on his profile and the proposed device.
Bibliography
(1) Stein, B. E., & Meredith, M. A. 1993. Cognitive neuroscience. The merging of the senses. Cambridge, MA, US: The MIT Press (1993)
(2) Meredith, M.A. 2002. On the neuronal basis for multisensory convergence: A brief overview. Cogn. Brain Res. 14, 31–40 (2002)
(3) Talsma, D., Senkowski, D., Soto-Faraco, S., and Woldorff M. G. .2010. The multifaceted interplay between attention and multisensory integration,Trends in Cognitive Sciences, 14, pp.400-410).
(12)Leiderman, H., Mendelson, J. H., Wexler, D., & Solomon, P. (1958). Sensory deprivation: clinical aspects. AMA archives of internal medicine, 101(2), 389-396.
(13) Sublon, G., & Achard, C. (2012). La stimulation multisensorielle comme outil de prise en charge orthophonique des troubles spatio-temporels et communicationnels de la maladie d’Alzheimer (Doctoral dissertation, Université de Lorraine).
(14) Martin, P. (2015). État de la recherche clinique sur l’approche Snoezelenutilisée en milieu résidentiel spécialisé. Revue francophone de la déficienceintellectuelle, 26, 161–180. https://doi.org/10.7202/1037056ar)
(15) Lancioni, G. E., Cuvo, A. J., & O’reilly, M. F. (2002). Snoezelen: an overview of research with people with developmental disabilities and dementia. Disability and rehabilitation, 24(4), 175-184.
(15b) Bryant et Bradley, 1985, Gentaz, Colé et Bara, 2003. Hatwell, Y., Streri, A., & Gentaz, E. (2000). Toucher pour connaître. Psychologie cognitive de la perception tactile manuelle. Paris : PUF.
(17) Rhyn, M., Pelle, C., Misso, V., & Barras, L. (2020). Les apports d’un environnement multisensoriel dans l’offre en soins hospitalière des adolescents en souffrance psychique, évaluation d’un projet clinique. Revue Francophone Internationale de Recherche Infirmière, 6(1), 100194.
(18) Baillon, S., Van Diepen, E., & Prettyman, R. (2002). Multi-sensory therapy in psychiatric care. Advances in psychiatric treatment, 8(6), 444-450.
(19) Martin, P. (2015). État de la recherche clinique sur l’approche Snoezelen utilisée en milieu résidentiel spécialisé. Revue francophone de la déficience intellectuelle, 26, 161-180.
(20b) Pignol, J., Lochelongue, V., & Fléchelles, O. (2008). Peau à peau: un contact crucial pour le nouveau-né. Spirale, (2), 59-69. Feldman, R. (2002). Les programmes d’intervention pour les enfants prématurés et leur impact sur le développement: et trop et pas assez. Devenir, 14(3), 239-263.
(21) Alexandra Prunier. L’impact de la stimulation multi-sensorielle sur la mémorisation à long terme.Education. 2015. dumas-01280883.
(22) Baker, J.M. andJordan, K.E. (2015), Chapter 11. The influence of multisensory cues on representation of quantity in children, Evolutionary Origins and Early Development of Number Processing, (pp. 277-304). United States of America : Elsevier Inc. Academic Press)
(23) Nakul, E., Orlando-Dessaints, N., Lenggenhager, B., & Lopez, C. (2017). Bases multisensorielles de la localisation du soi. Approches par des conflits visuo-tactiles dans un environnement virtuel. Neurophysiologie Clinique, 47(5-6), 344.
(24) Botherel, V., Chêne, D., & Joucla, H. (2019, October). Une conception universelle mise en œuvre via des modes d’usages. In Journée annuelle du Sensolier 2019.
(25) Hervé Segond, Stéphane Maris, Yves Desnos, Perrine Belusso. IHM de Suppléance Sensorielle Visuo-Tactile pour Aveugles et d’Intégration Sensorielle pour Autistes. Journal d’Interaction Personne-Système, Association Francophone d’Interaction Homme-Machine (AFIHM), 2011, 2 (1), pp.1-15.


